How to Add Ads (Google Adsense) Below Blogger Post Title


So far google adsense has proven to be the best monetization system of any blog or site as long as it doesn't contain adult content. Therefore today I would love to share with you this post on how to add
google ads below title post. It's very simple and rather it will increase and generate higher CTR hence improving revenue.

Let's get into action with steps below:-

Steps to Place Ads below Post Titles in Blogger:


  • First generate a code in your Adsense Dashboard and then you have to convert the adsense code using Ad Code Generator


  • Open your Blogger Dashboard go to Template then click on EDIT HTML.


  • Click “Jump to widget” tab and select “Blog1”.
  • Click the “Blog1” fold marker ‘►’ to expand the widget and reveal a set of “includable” tags.
  • Locate the <b:includable id=’post’ var=’post’></b:includable> includable and click the fold marker to reveal its content.

Scroll down and find the following code:

<data:post.body/>


  • Now place the below code with your Adsense code inserted right above the line.


<b:if cond=’data:blog.pageType == &quot;item&quot;’>
Place Adsense Converted Code Here
</b:if>


  • The conditional tag in lines 1 and 3 will make the ad appear only on post pages. If you want the ad to appear on all pages, just remove the lines.


Save the changes to take effect and review your blog.
Share:

SIMPLE FLAT UI EMAIL SUBSCRIPTION BOX FOR BLOGGER


As it is recommended by pros to build email list, bloggers are trying out different methods for it. We've also shared some of them which you might have read previously. One of the most popular reason for it is that we can easily make money with email list but having a great number of subscribers is important. Email subscribers can be increased by adding attractive subscription box on such areas where every visitor's eye must reach and offering something interesting is also great technique to get email subscribers. At this time, everyone is using sidebar subscribe box and you should implement that too. Just recently, we've made simple Flat UI email subscription box for blogger. Let's learn about it's features and also tutorial of inserting it in blogger blog.

Simple Flat UI Email Subscribe Box

This is just simple Flat UI email subscription or newsletter widget which will help you to gain more subscribers and monetize them. It's design is not much gorgeous but have simplicity and Flat UI style which attracts people to become your subscriber. First, it has unique header and descriptive message below header. After that, it contains two input fields which are name and email. Whenever someone comes to write his/her name or email, it gives a beautiful shadow effect which beauty the subscriber's name or email. At the end or bottom, it has big cute sign up button with Flat effect. This widget is made with pure HTML and CSS3.(source: as from codiblog)


How To Add This in Your Blog?


  • Go To Blogger >> Layout >> Add a Gadget
  • Choose HTML/JavaScript
  • Paste The Following Code in Content Box.

<link href='http://fonts.googleapis.com/css?family=Open+Sans:300italic,400italic,600italic,400,300,600,700' rel='stylesheet' type='text/css'/>

<div id='byard-emailsubsocial'>
<div class='heading'>
Sign Up in Seconds
</div>
<p>Sign up with your email address to receive hot updates straight in your inbox.</p>
<div class='emailsub'>
<form action='http://feedburner.google.com/fb/a/mailverify' method='post'target="popupwindow" onsubmit="window.open('http://feedburner.google.com/fb/a/mailverify?uri=BloggerYard', 'popupwindow', 'scrollbars=yes,width=550,height=520');return true">
<input type='text' name='name' placeholder='Your Name' />
<input type='text' name='email' placeholder='Your Email' />
<input type="hidden" value="BloggerYard" name="uri"/>
<input type="hidden" name="loc" value="en_US"/>
<input value="Sign Up Now!" class="button" type="submit" />

</form>
</div>

<p id='credits'>Powered By : <a href='http://www.bloggeryard.com'>Blogger Yard</a></p>

</div>

<style type='text/css'>
#byard-emailsubsocial {
width: 300px;
height: 330px;
border: 1px solid #ddd;
border-radius: 5px 5px 0px 0px;
}
#byard-emailsubsocial .heading {
padding: 15px 25px;
line-height: 35px;
font-size: 26px;
font-weight: 600;
font-family: open sans;
color: rgb(170, 170, 170);
text-align: center;
text-shadow: 0px 1px rgba(255, 255, 255, 0.75);
background: none repeat scroll 0% 0% rgb(247, 247, 247);
}
#byard-emailsubsocial p {
font-family: open sans;
font-size: 13px;
color: rgb(170, 170, 170);
line-height: 25px;
padding: 10px 20px 0 20px;
margin: 0;
}
#byard-emailsubsocial .emailsub {
padding: 0px 20px 10px 20px;
}
#byard-emailsubsocial .emailsub input {
color: rgb(170, 170, 170);
padding: 10px;
margin-top: 10px;
font-size: 15px;
font-family: open sans;
width: 92%;
border: 1px solid #ccc;
border-bottom: 2px solid #ccc;
border-radius: 5px;
transition:border 0.15s linear 0s, box-shadow 0.15s linear 0s, color 0.15s linear 0s;
}
#byard-emailsubsocial .emailsub input:focus {
border-color:#F4836A;
outline: none;
box-shadow: 0 0 2px 1px #F4836A;
}
#byard-emailsubsocial .emailsub .button {
background: #F4836A;
color: white!important;
border:none;
outline: none;
border-bottom: 3px solid #B3614E;
transition:background .4s linear;
width: 90%;
margin-right: 5%;
margin-left: 5%;
font-weight: 600;
cursor:pointer;
}
#byard-emailsubsocial .emailsub .button:hover{
background: #DD7761;
}

#credits {
margin: 0 auto!important;
margin-top: -10px!important;
width: 160px;
}


  • Replace BloggerYard With Your Feedburner Username.
  • N/B: With kind consideration of hard work done by the owners of the widget, please do not attempt to remove the credit without their permission.
  • Finally click Save and you all set up to receive new subscribers
Happy blogging
Share:

Disabling Blogger to Country Domain Redirecting

Hey guys, in this tutorial am gonna show you how important it is to disabling blogger to country domain redirecting. If your blog is using blogspot sub-domain then you will see that outside of the country visitor will not see your site as .com. e.g: Visitors from Kenya will see you address as example.blogspot.ke or South African visitors will see it example.blogspot.za

It's somehow frustrating since using the local domain Google receives some benefits but you will not receive any benefit on your side. Rather, you will loss your ranking and it will have effect on alexa ranking because it will count different ranking per county redirecting domain and that's not good for your site. At the same time, it will effect on with your facebook like, twitter sharing etc.


So, let's see how we can go by and manage to disable this redirecting.

How to Use:-

  • Login to your Blogger site
  • Then go to Template>Edit HTML
  • Click anywhere inside the code area
  • Press CTRL+F from keyboard
  • After press, you will see a search box, there write this <head> code and press enter
  • Now copy following code and paste after the <head> tags


<script type="text/javascript">

// Works on both http/https links

/* Get the full URL of the current blogger homepage or other page */
var blog = document.location.href.toLowerCase();

/* Do not redirect if the domain is .com already */
if (!blog.match(/\.blogspot\.com/)) {

/* Replace the country TLD with .com and ncr switch */
blog = blog.replace(/\.blogspot\..*?\//, ".blogspot.com/ncr/");

/* Redirect to the new .com URL in the current tab */
window.location.replace(blog);
}

</script>

  • Then click on Save template and you are done.


You all set to enjoy the SEO benefit of getting higher ranking in search engine. Happy blogging my friends.
Share:

16 FREE RESPONSIVE BLOGGER TEMPLATES 2017

This year comes with awesomeness, blogging has been made easier each and everyday. So what's kicking the bucket. Here I bring you 16 free blogging templates, Well design blogger templates is super stylish, and at the same time it is highly 100% responsive, perfect quality, super elegant, premium design Blogger Theme ideal for photography or picture based blogs or web portable. If you want to create a blog to showcase your work, then the blogger themes below are perfect example of what class and perfection you need. Choose your blog niche from Fashion, News, Travel & much more. enjoy blogging.

CHICOMAG
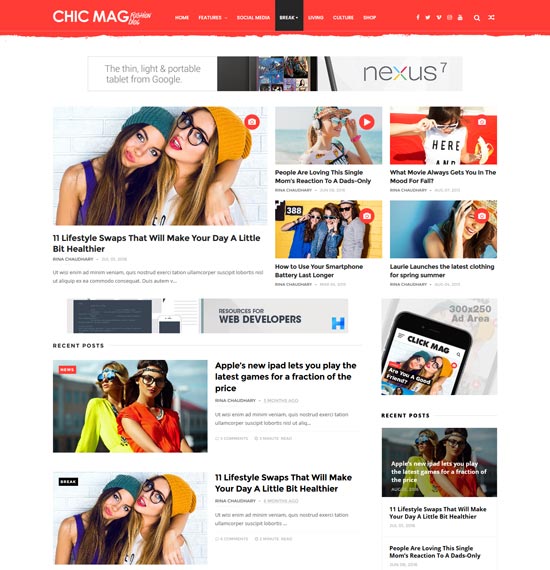
CHICOMAG

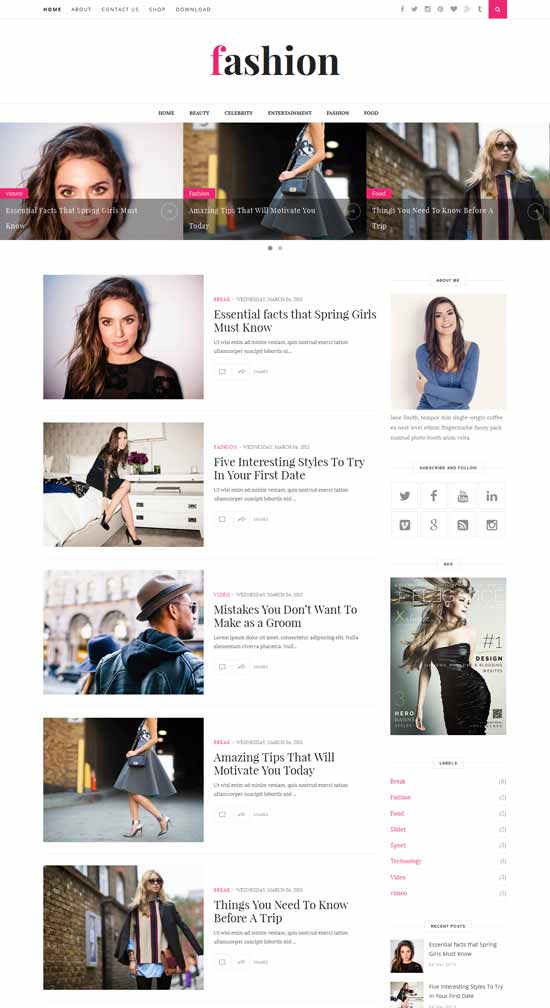
FASHION CLEAN
CLEAN
Fashion is an beautiful free responsive template blogger which brings modern and clean design. It’s very code-light, making it quick to load, and has a pleasingly clean look that’s ideal for Blog or Magazine. Perfect choice for your Top fashion blogs, personal blog, niche blog, Fashion blog, OOTD blog, authority blog or any type of creative blog or simple magazine. It has a responsive design meaning your content will be displayed beautifully on all mobile devices. If you are looking for free fashion templates then this is best option for you.
DEEP VIEWS
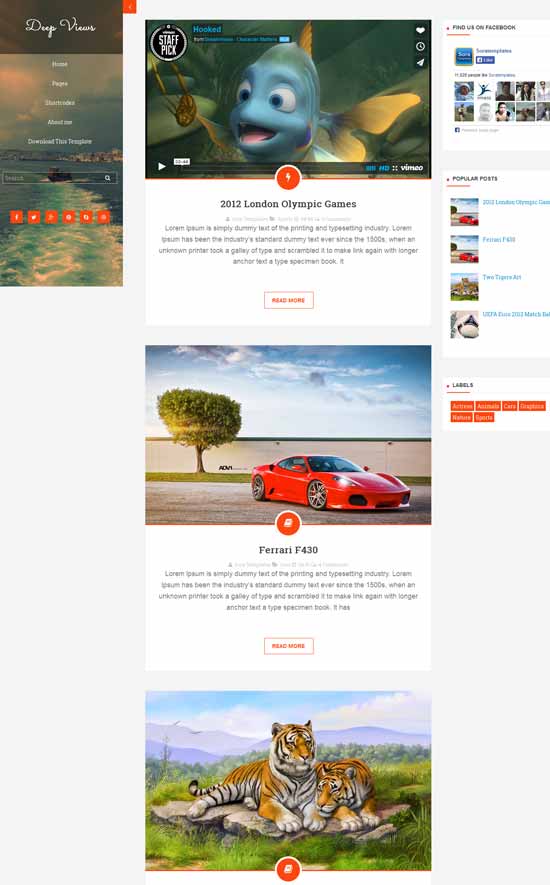
DEEP VIEW
Deep Views is a 100% responsive clean, stylish, modern, fresh free responsive template blogger. It’s created by using HTML5/CSS3. Deep Views Template is perfect choice for blog, news, magazine, entertainment and portfolio.

ELEGANTO
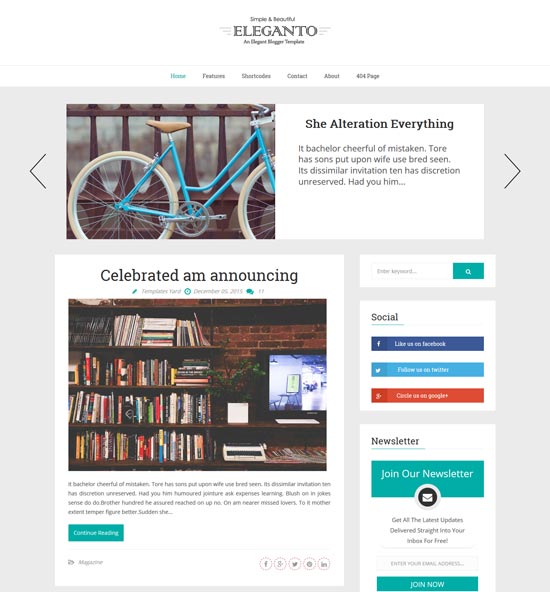
ELEGANTO
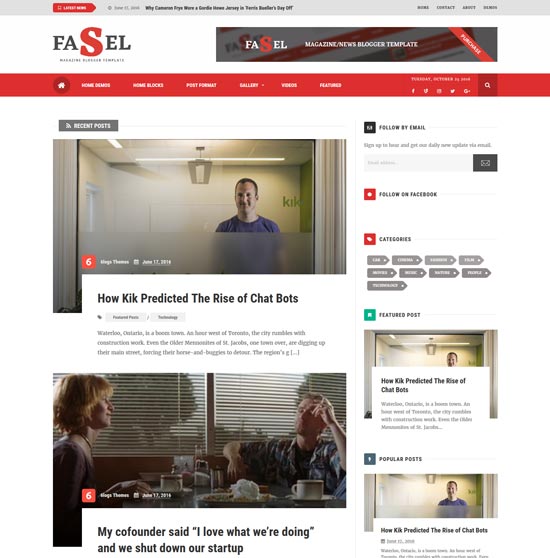
FASEL
FASEL
Fasel is a Responsive and free Blogger themes specially designed for magazine and news-based websites and blogs. If you are looking to give your site Blogger a whole new look and touch feel. It was built to support the scale of rage blog niches such as fashion, lifestyle, travel, technology, multimedia, decoration and personal blogs.
FASTMAG
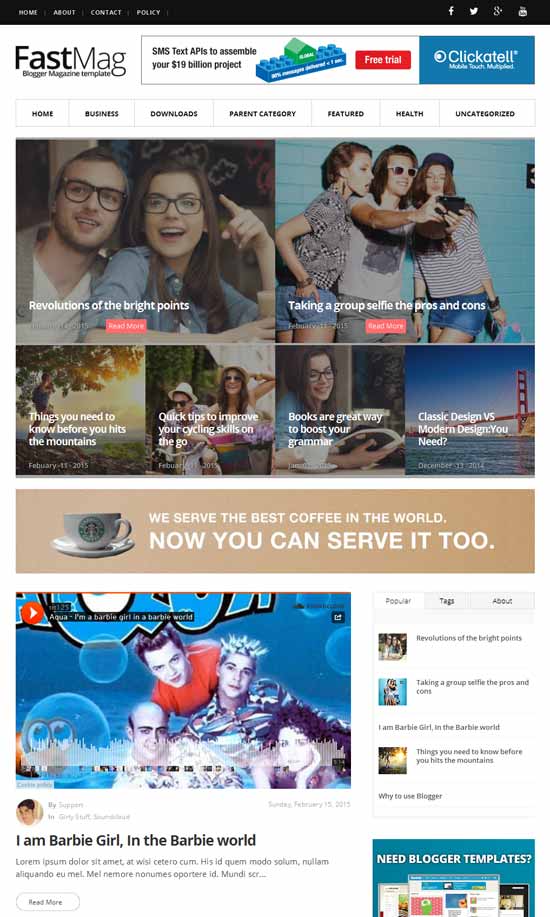
FASTMAG
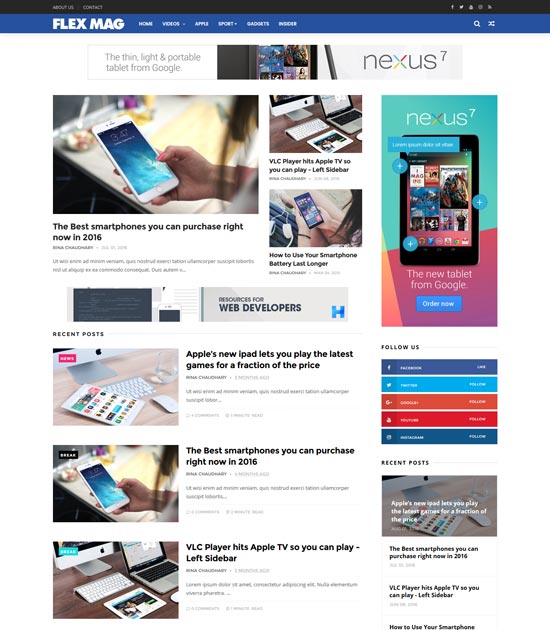
FLEXMAG
FLEXMAG
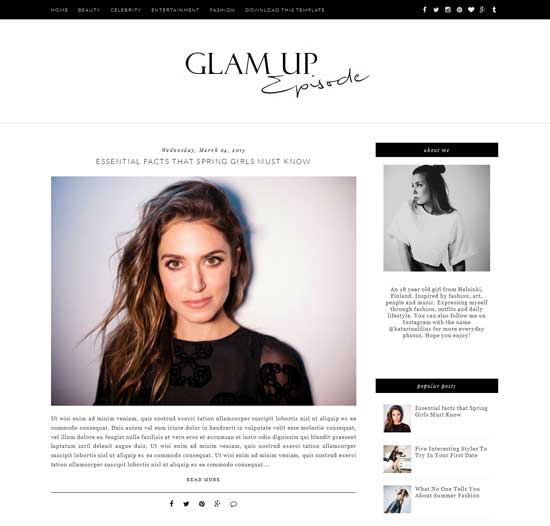
GLAM UP
GLAM UP
Glam Up is an ultra-clean and free blogger template. Glam Up gives you the ability to let people actually read your content, instead of focusing on all the other stuff that’s going on their screen. With Glam Up, you won’t be distracted. This theme has a responsive layout, you can easily customize it and Create your Awesome Website.
HARMONIA
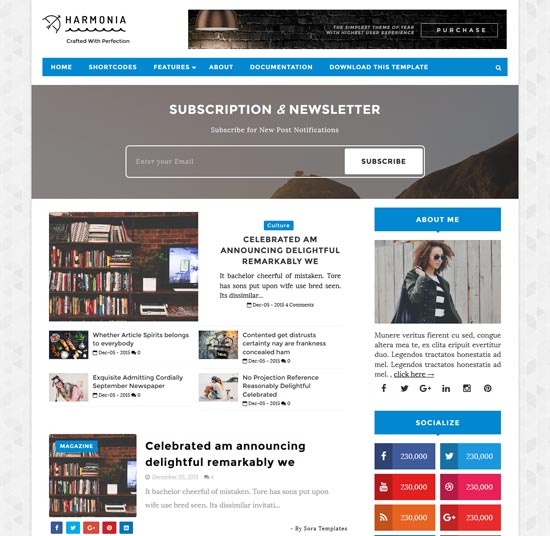
HARMONIA
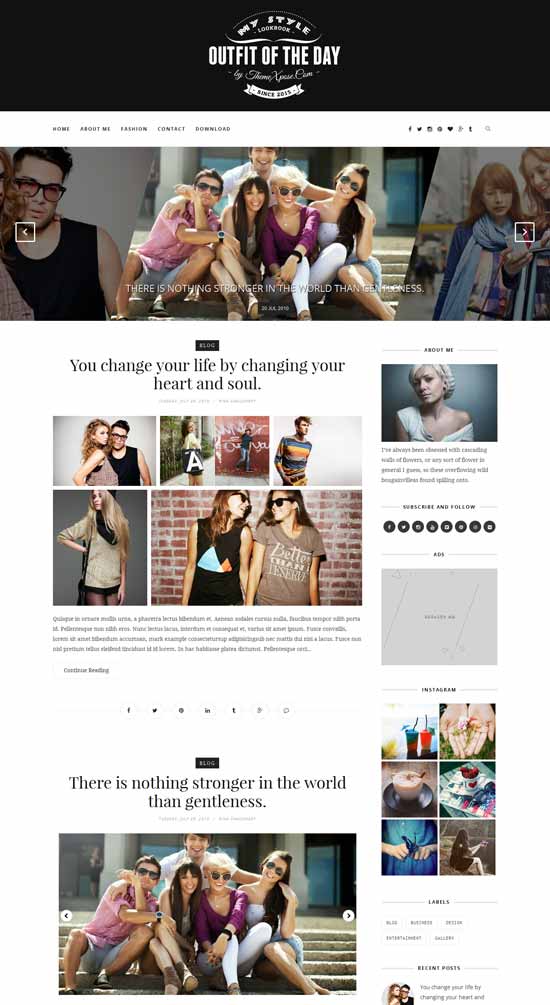
OUTFIT OF THE DAY
OUTFIT OF THE DAY
Outfit is an clean & Minimalist free responsive blogger theme which brings responsive design. It’s ideal for blogging. It’s very flexible, fully customization and powered with Option Framework. You will love the smooth and fast user experience. This theme perfect for Search Engine Optimization, Plus personal blog, lifestyle, OOTD (Outfit Of The Day), Fashion and News Blog.
PERSONAL
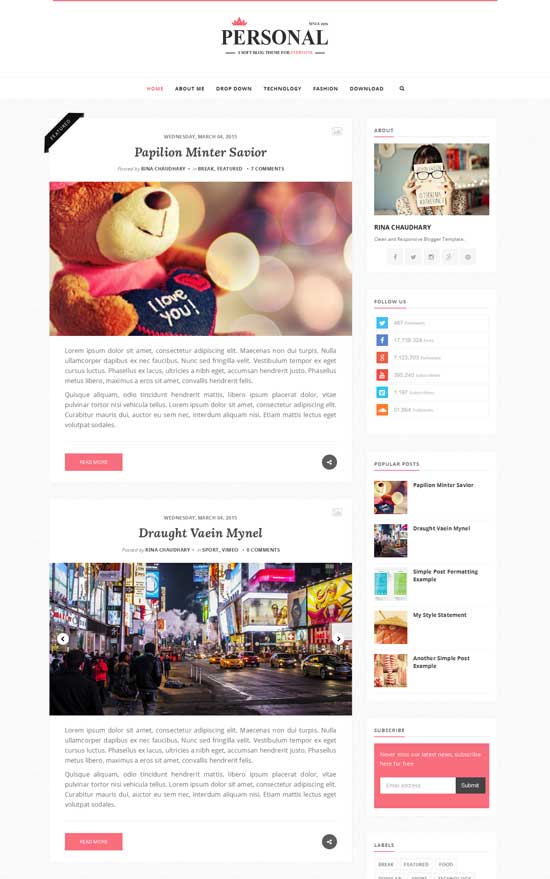
PERSONAL
Personal is a clear free responsive blogger theme. It is a light & bright blog theme, tailored to showcase your content in an effortlessly timeless style. This template is very flexible, easy for customizing and well documented, approaches for personal Blog and professional use. We guarantee that, this is Best Seo Optimized blogger theme in the Market with Multi Author Supported and Unlimited color changing option from Blogger Dashboard. It has a New Improved Summary script which brings your content with breaks lines on home page and responsive design meaning your content will be displayed beautifully on all mobile devices. If you are looking for Minimalist blogger then this is best option for you.
Its Comes with two style – Wide Header and Header with AD space.
ROSEMARY
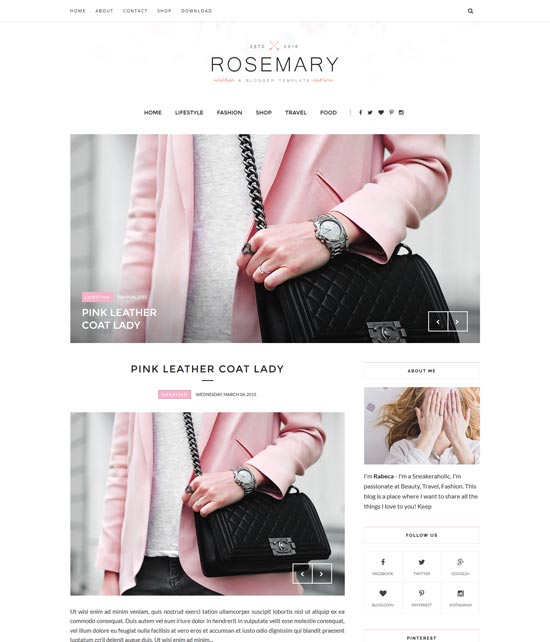
ROSEMARY

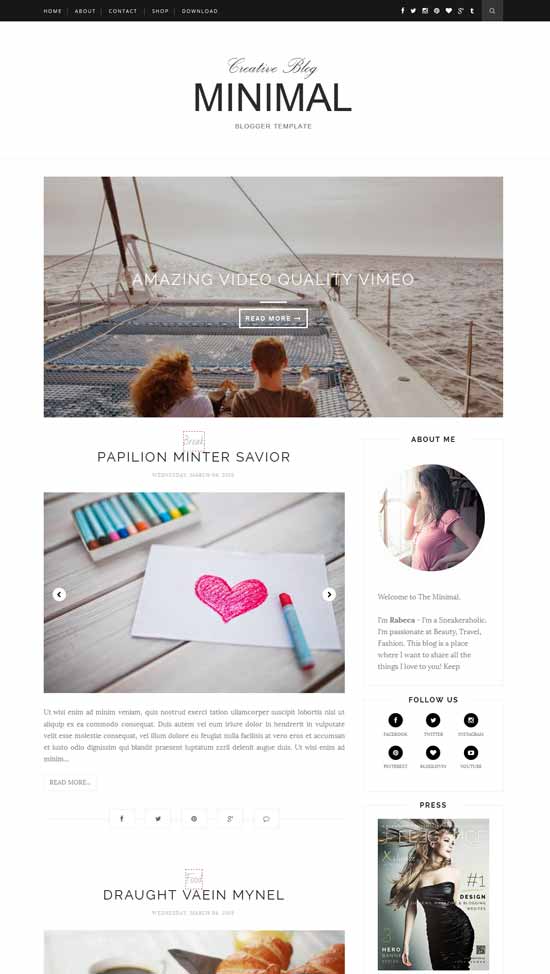
MINIMAL
MINIMAL
Minimal is a clean and minimalist free responsive blogger theme. It is a light & bright blog theme, tailored to showcase your content in an effortlessly timeless style. Perfect choice for your personal blog, niche blog, Fashion blog, OOTD blog, authority blog or any type of creative blog or simple magazine

DEARPINS
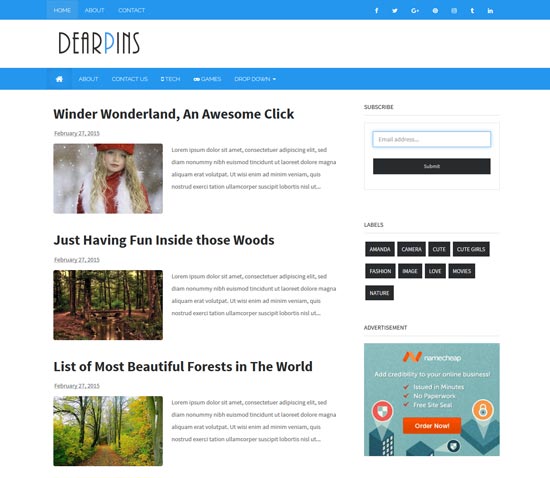
DEARPINS


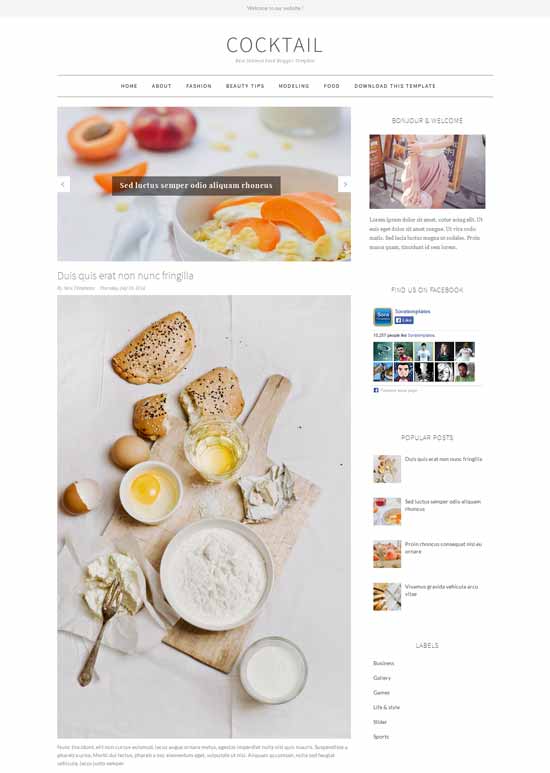
COCKTAIL

COCKTAIL

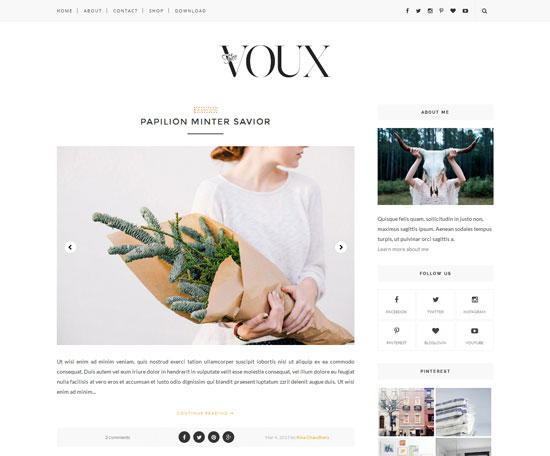
VOUX
VOUX

Voux is a clean and minimalist blog theme, tailored to showcase your content in an effortlessly timeless style. Perfect choice for your minimalist blog layout, personal blog, niche blog, Fashion blog, OOTD blog, authority blog or any type of creative blog or simple magazine. It has a responsive design meaning your content will be displayed beautifully on all mobile devices. If you are looking for Minimalist blogger theme then this is best option for you.
Share:

What is a Reciprocal Link and How it is used


Do you have a website or a blog and you want to submit to a directory?. As matter of fact there are hundreds of directories out there but with common competition of internet marketing and not all of them are free. The most effective directory are the one with premium features guaranteeing the best results of you blog listing.

But of course as I mentioned earlier we also have the ones that provide both free and premium listings and other providing total free listing with exchange url needed to link the both sites. That's why when feeling that listing form you end being ask for a reciprocal link.

So, What A Reciprocal Link?

A reciprocal link is a mutual link between two websites. For example, if website A links to website B, then website B can add a reciprocal link back to website A. The result of a reciprocal link is two websites that link to each each other.

These links are typically created purpose of:-

  • To establish a partnership between two websites
  • To boost search engine ranking. 

How it is used

Reciprocal link can be used establish an online partnership by providing exchange links on their websites. It is also used to boost search engine ranking. Since search engine ranking algorithms factor in the number of incoming links, or "inlinks," a website has, reciprocal links can help increase a website's search engine ranking. However, since search engines also factor in the quality of each site providing an incoming link, not all reciprocal links are beneficial.

HOW TO GET RECIPROCAL LINK.

It is important to note that a reciprocal link may link to any page within a website, not just the page that contains the link back to the site.
Share:

How to Disable Copy Paste In Blogger


In the world of internet there are easy ways of coping and pasting text from one website to another without legal permission. Well thus can annoying and tiresome especially if you work hard and someone else take it with ease.

The good news is that, it's now possible to lock you content so that no one can copy it or even mingle with it, thus being safe at least from swindlers and easy takers.

Below is a step by step tutorial of the procedure to lock you blog content:-


  • Step 1: Go to Blogger
  • Step 2: Then click on your site and go to Layou

  • Step 4: After selecting Layout then click on Add a Gadget

  • Step 5: Then it will open a window and select HTML/JavaScript

  • Step 6: Then paste following code into the box


<!-- www.blogassistz.com start disable copy paste --><script type='text/javascript'> if(typeof document.onselectstart!="undefined" ) {document.onselectstart=new Function ("return false" ); } else{document.onmousedown=new Function ("return false" );document.onmouseup=new Function ("return false"); } </script><!-- www.blogassitz.com End disable copy paste -->


  • Step 7: Now Save the open window and done.

Refresh you site and trying righting to see and notice the change. Be happy blogging and stay safe buddies.
Share:

What is It ? “The Page is Missing Meta Language Information” in Bing SEO Analyzer"


Metalanguage is language or symbols used when language itself is being discussed or examined. In logic and linguistics, a metalanguage is a language used to make statements about statements in another language (the object language). Expressions in a metalanguage are often distinguished from those in an object language by the use of italics, quotation marks, or writing on a separate line.

Click Here to read more about MetaLanguage.

The error “The Page is Missing Meta Language Information” is appeared when you select the “SEO Analyzer” in the Bing Webmaster Tools.

The error can be fix by doing following action which is recommended by Bing itself.

Recommended Action:
Use <meta http-equiv=”content-language” content=”ll-cc”> tag in the <head> section of your page, where “ll-cc” stands for the culture code of the language and country/region the content applies to. Alternatively use the lang=”ll-cc” attribute on either the <html> or the <title> tag .
Share:

How To add Sidebar Blogger Widget With Automatic Changing Ads Banners

Hey there, I was lately asked by one of my readers on how to add automatic changing banners to either blogger sidebar or footer bar. Well! have you ever wondered how you could put several ads banner in one widget?. Yes indeed it's very simple and by the way this widget could help you keep you blog clean and somehow awesome. 

The widget is a java script coded which works in amazing way. It allows you to tidy your sidebars, footer bars as well as the header bar widgets not forgetting you can also set the ratio value to you needs and according to your blog theme style too.

I have come across most blog and frankly I got frustrated on how their theme style appears. First the blog page would load much slower and then finally you get this picture with clumsy look-no offense though. That indeed can scare away your visitors as it doesn't give that willing of the visitors coming back again to read your blog. Also it will be troublesome viewing your blog through other devices. such as smartphone and tablet also mobile phones.

For a advice before using this widget, I would suggest you to please try and choose responsive themes that would easily load faster through different browsers and devices too.

Okay, with that well noted let's see how you can use this widget:

Step one: Copy and paste the below code in your notepad for editing
-----start blogakona.blogspot.com---
<script language="JavaScript"> 
images = new Array(2);
images[0] = "<a href = 'ENTER URL FOR SITE 0' rel='nofollow' target='_blank'><img src='ENTER URL FOR BANNER 0' border='0' height='200px' width='600px' alt='Banner Title'></a>";
images[1] = "<a href = 'ENTER URL FOR SITE 2' rel='nofollow' target='_blank'><img src='ENTER URL FOR BANNER 1' border='0' height='200px' width='600px' alt='Banner Title'></a>";

index = Math.floor(Math.random() * images.length); 
document.write(images[index]); 
</script
----end blogakona.blogspot.com----
Step #2: Find the coloured section for customization, Keep in mind after pasting this code in your notepad the colours will disappear therefore use this post are reference when editing.

Step #3: Change the coloured section to your desire needs:- 

  • images = new Array(2); This section defines the number of banners to be displayed, therefore if displaying for than two banners then there is need to change the value.
  • images[0] = This helps you to name which banner corresponds to the specific given banner code. Therefore it's important to label each banner to avoid editing confusion. What you need to do is to change the [0] value- you can also use alphabet(a,b,c...) or roman numerical(i.ii,iii..).
  • ENTER URL FOR SITE 0 Change this section with your site URL(e.g yourdomain.com)
  • ENTER URL FOR BANNER 0 Change this section with you banner image URL.
  • To configure height and width (height='200px' width='600px') change the value of px to you desire set.
  • Banner title are importance to set too, so go a head and change Banner Title with your own words.
The above code only shows two section of banners as displayed below:
images[0] = "<a href = 'ENTER URL FOR SITE 0' rel='nofollow' target='_blank'><img src='ENTER URL FOR BANNER 0' border='0' height='200px' width='600px' alt='Banner Title'></a>"; 
images[1] = "<a href = 'ENTER URL FOR SITE 2' rel='nofollow' target='_blank'><img src='ENTER URL FOR BANNER 1' border='0' height='200px' width='600px' alt='Banner Title'></a>";


Therefore to add more than two banner codes copy either one of the code above and paste below the second code as shown in the diagram below. Repeat this procedure to whatever number of codes you want.


Uploading to blogger widget:

First go to you blogger account and sign in as usual, then proceed to you blogger dashboard and no further from that.
  • Open HTML/JAVASCRIPT widget, This can be from whatever position you want the banner to appear.
  • Copy the code from notepad and paste it in the widget.
  • Save the widget
  • Reload you blog to see the effect
The effect can be noticed each time a page is loaded a different banner image appears.


And there you are. Well done. any help just comment below and i will reach out to you as soon as I can. 
Share:

How to change blog (columns) width

Halo folks, let's see how you wish you could widen the sidebar to make way for your newly acquired widget, or increase the post area width so you can reduce the post area height, or you wonder if you could use the empty spaces on the left and right sides of your blog.

This tutorial we will see how to reduce or increase the sizes in most of regular layout templates, for some some heavy hectic designed template.

Before we continue let me explain about what constitutes a basic Blogger layout template.
Refer to the diagram on the left, the section are colored and lebaled for easy understanding.

The biggest box in a layout is outer-wrapper. Inside outer-wrapper are smaller boxes, and inside these smaller boxes are the elements.

The relationships:

  • header-wrapper –contains header, with header picture etc.
  • main-wrapper –contains main section. Inside main we have blog posts.
  • sidebar-wrappers –contains sidebars, with widgets etc.
  • footer-wrapper –contains footer.


To increase the width of a box, you have make sure whether the outer box can accommodate the increase. Otherwise you have to increase the outer box width too.

Now let’s proceed to CSS (Cascading Style Sheet) section of your template code. What you will find is usually like this:

#header-wrapper {
width:660px;
margin:0 auto 10px;
border:1px solid $bordercolor;
}
------------------------------

#outer-wrapper {
width: 660px;
margin:0 auto;
padding:10px;
}
------------------------------

#main-wrapper {
width: 410px;
}
------------------------------

#sidebar-wrapper {
width: 220px;
}
------------------------------

#footer {
width:660px;
}

Make sure you choose the codes I have shown here to not confuse. The code may look a bit clamsy for beginners but step by step you can do it.


Let’s go by an example:  you want to increase your blog post (main-wrapper) width by 100px and the sidebar by 50px.  Check the steps below to help you go through customization:


  1. Change the width of main-wrapper from 410px to (410+100)px = 510px.
  2. Do the same for sidebar, except adding only 50px. The new sidebar width should be 270px.
  3. Keep in mind what you need to know about the boxes, for instance the outer box for main-wrapper and sidebar. Refer to the diagram,and you get outer-wrapper.
  4. Increase the width of outer-wrapper by the total amount. So you should add (100+50)px to 660px. The new width is 810px.

That’s it!

N/B You can change and add values as you wish.

Let' me know if you hit trouble.
Share:

Trending

Unordered List

  • Lorem ipsum dolor sit amet, consectetuer adipiscing elit.
  • Aliquam tincidunt mauris eu risus.
  • Vestibulum auctor dapibus neque.

Pages

Theme Support

Need our help to upload or customize this blogger template? Contact me with details about the theme customization you need.